Diagnostic Target — group analysis
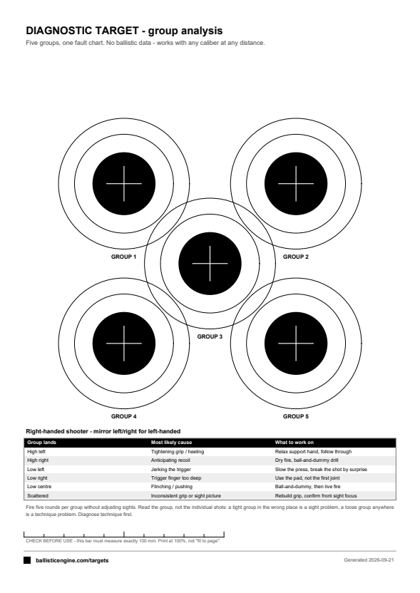
Five separate aiming points and a fault chart. No ballistic data and no fixed distance: this sheet is about how you are shooting, not what you are shooting.
How to use it
- Print at 100%. Distance does not matter — pick one you can group at.
- Fire five rounds per bullseye without touching the sights between groups.
- Read the group, not the shots. A tight group in the wrong place is a sight problem.
- A loose group anywhere is technique — use the chart to name the fault.
Fault chart
| Group lands | Most likely cause | What to work on |
|---|---|---|
| High left | Tightening grip / heeling | Relax support hand, follow through |
| High right | Anticipating recoil | Dry fire, ball-and-dummy drill |
| Low left | Jerking the trigger | Slow the press, break the shot by surprise |
| Low right | Trigger finger too deep | Use the pad, not the first joint |
| Low centre | Flinching / pushing | Ball-and-dummy, then live fire |
| Scattered | Inconsistent grip or sight picture | Rebuild grip, confirm front sight focus |
Other targets
- Zeroing Target — 9×19mm @ 25 m
- Zeroing Target — 5.56 NATO @ 100 m
- Zeroing Target — .308 Win @ 100 m
- Holdover Chart — 9mm, 7 to 50 m
- Holdover Chart — 5.56 NATO, 50 to 300 m
- ISSF 10-Ring — Olympic air pistol
- NRA B-8 Repair Centre — 25 yd pistol
- IPSC / USPSA Classic
- IDPA Target
- FBI Q Silhouette
- Threat Silhouette — no zones
Customize for your setup. Barrel length, altitude and temperature all move the drop. The calculator takes any load in the database and recomputes this table for your conditions.