Zeroing Target — 9×19mm Parabellum at 25 m
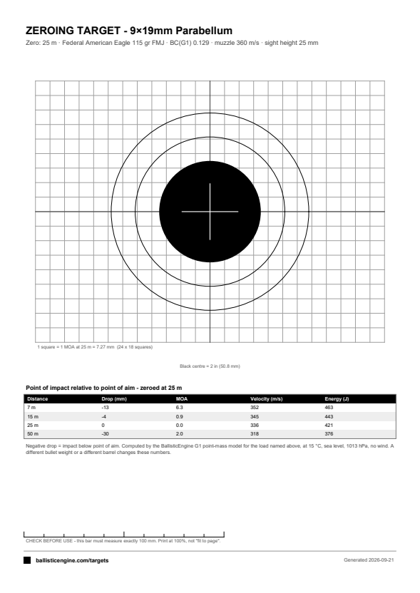
A 25 m pistol zeroing sheet with a 2-inch black centre, a grid of exactly one MOA at 25 m, and the point-of-impact shift at 7, 15, 25 and 50 m for a named factory load.
How to use it
- Print at 100% — not "fit to page". Measure the 100 mm bar on the sheet before you shoot.
- Set the target at 25 m and fire a five-round group at the black centre.
- Count grid squares from the group centre to the aiming point: each square is one MOA.
- Adjust, confirm, then read the table for where the same load lands at 7, 15 and 50 m.
Ballistic data on this sheet
| Distance | Drop (mm) | MOA | Velocity (m/s) | Energy (J) |
|---|---|---|---|---|
| 7 m | -13 | 6.3 | 352 | 463 |
| 15 m | -4 | 0.9 | 345 | 443 |
| 25 m | 0 | 0.0 | 336 | 421 |
| 50 m | -30 | 2.0 | 318 | 376 |
Computed by the BallisticEngine G1 point-mass model at 15 °C, sea level, 1013 hPa, no wind. Negative drop means the bullet lands below the point of aim. A different bullet weight or barrel length moves every number in this table — run your own load.
Other targets
- Zeroing Target — 5.56 NATO @ 100 m
- Zeroing Target — .308 Win @ 100 m
- Diagnostic Target — group analysis
- Holdover Chart — 9mm, 7 to 50 m
- Holdover Chart — 5.56 NATO, 50 to 300 m
- ISSF 10-Ring — Olympic air pistol
- NRA B-8 Repair Centre — 25 yd pistol
- IPSC / USPSA Classic
- IDPA Target
- FBI Q Silhouette
- Threat Silhouette — no zones
Customize for your setup. Barrel length, altitude and temperature all move the drop. The calculator takes any load in the database and recomputes this table for your conditions.